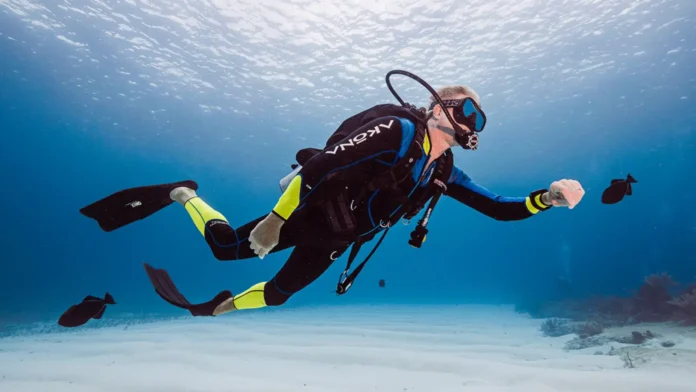
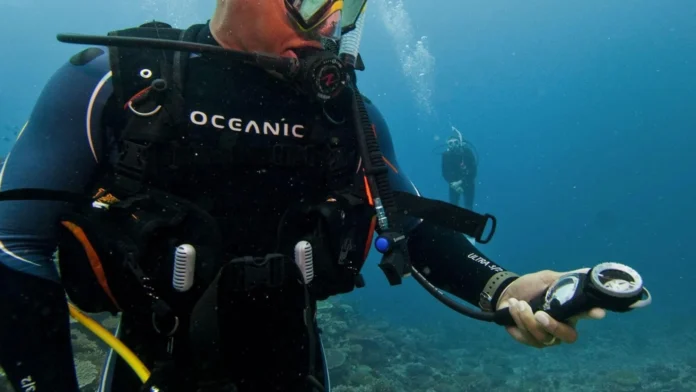
Good weighting and trim are the cornerstones of enjoyable diving. If you’ve ever found yourself fighting to stay down, drifting up uncontrollably, or tilting feet-first through the water, chances are your balance between weight and body position isn’t quite right. Getting it correct changes everything. You move more efficiently, breathe easier, and look and feel like a confident diver.
This guide explains how recreational divers using single tanks and wetsuits can perfect their weighting and trim. We’ll look at practical steps for buoyancy checks, how to distribute weight, and how posture affects your position in the water. We’ll also compare different gear setups – backplate and wing, jacket-style BCDs, and sidemount – before finishing with how drysuit diving alters the picture.
Why Weighting and Trim Matter
When your weighting and trim are right, you become streamlined and hydrodynamic. You glide through the water rather than plough through it, which lowers your effort and air consumption. You also protect the environment, hovering above reefs and sandy bottoms without bumping into corals or stirring up silt clouds.
On the other hand, poor weighting and trim make dives frustrating. Overweighting forces you upright and makes you constantly add air to your BCD, increasing drag. Underweighting means fighting to descend or drifting upwards at the end of a dive. Both situations waste energy, shorten dive time, and can compromise safety.
Step 1: Getting the Weight Right
Correct weighting is the foundation. To check yours:
- Enter the water in full gear with an empty BCD.
- Breathe normally. On a normal inhale you should float at eye level.
- Exhale completely. You should sink slowly and controllably.
If you sink like a stone, remove weight. If you cannot sink at all, add weight in small increments. A final test comes at the end of a dive: with only 50 bar/500 psi in your tank, you should be able to hover neutrally at 5 metres without difficulty.
Keep a log of how much lead you use with different wetsuits, tanks, and conditions. This creates a personalised reference for future dives. Many divers are surprised to learn they can safely shed several kilos once they run a proper check – improving their weighting and trim instantly.
Step 2: Distributing Weight for Better Trim
The amount of lead you carry is only part of the equation. Where you place it directly influences your trim underwater.
- Balance weight evenly left and right to avoid rolling.
- Use trim pockets high on your BCD or tank band to move ballast off your waist.
- If your feet sink, shift weight upwards. If your head drops, shift it down.
- Adjust your tank position – even a few centimetres higher or lower can rebalance you.
- Consider your fins: heavy fins pull feet down, light fins may let them float.
Avoid stacking all the weight on a belt if possible. Spreading it out across waist, trim pockets, and tank band creates a smoother, more level posture and is key to fine-tuning weighting and trim.
Step 3: Posture and Technique
Even with perfect weight placement, poor posture can ruin your trim. Focus on body position:
- Keep your head up, looking forward.
- Arch your back slightly, shoulders back, chest open.
- Bend your knees about 90 degrees with fins lifted slightly above your body line.
- Fold arms in front rather than letting them dangle.
Test this by hovering motionless. If you tip head-up or feet-down without moving, adjust your weight placement until you stay flat. This combination of correct posture and balanced weighting results in effortless horizontal trim.
Gear Considerations for Weighting and Trim
Backplate and Wing
A metal backplate adds built-in negative buoyancy high on your back, reducing the lead you need. Trim pockets on tank bands offer flexible options for moving weight up or down. Many divers find their weighting and trim improve dramatically after switching to a backplate and wing system.
Jacket-Style BCDs
Jackets concentrate weight around the waist, which often leads to a foot-heavy position. If available, use rear trim pockets to move some lead higher. Lower or raise your tank slightly to balance. With attention to placement, you can still achieve excellent trim in a jacket.
Sidemount
Sidemount divers distribute weight along a harness and spine panel. Balancing ballast is vital to maintain symmetry and good weighting and trim, particularly with aluminum tanks that grow buoyant as they empty. Using modular weight pockets lets you adapt as needed during a dive.
Weighting and Trim in a Drysuit
Switching from wetsuit to drysuit changes everything.
- Drysuits add buoyancy, often requiring 2–3 kg more lead.
- Weights work best placed around the hips to counter buoyant legs.
- Heavier fins or ankle weights can help manage floaty feet.
- The air bubble inside the suit must be controlled – add only enough to prevent squeeze and stay warm.
Expect a learning curve. Trim may shift during the dive as the suit compresses and expands. With practice, however, you can achieve the same stable weighting and trim in a drysuit as in a wetsuit.
Final Thoughts
Mastering weighting and trim transforms your diving. Start with an accurate buoyancy check, distribute weight smartly, and perfect your body posture. Adjust for your gear – whether jacket, backplate and wing, or sidemount – and make the necessary changes if moving into drysuit diving.
The result is effortless control, lower air consumption, and a more enjoyable, environmentally friendly dive. With a little attention and practice, good weighting and trim will soon become second nature, and you’ll glide through the water with ease.


